Total Pageviews

VISITORS MAP

VISITORS FLAGS

free counters

REBORN DOLL KITS ONLINE FACEBOOK PAGE

Wit & Whimzy Reborn Nursery Zazzle.com Store.


View more gifts at Zazzle.

Tuesday, January 31, 2012

TUTORIAL - GENESIS HEAT SET PAINT -COLOR #3 - WARM BLUSH

Genesis Instructions
Color #3: Warm Blush

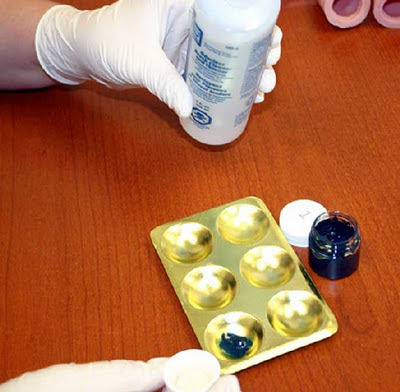
 Color #3 (Warm Blush). This color adds even more depth and warmth to the skin tone and can help achieve the blotchy look of a newborn. This color is added in the same manner as Color #1, but I like to dab this color here and there leaving small spaces without painting them to help achieve a newborn complexion. If you are trying to make an older baby, you may want to add this color evenly. Thin the paint to a water color consistency with odorless thinner or Mineral Spirits. The following charts illustrate where this color is used.


ORIGINAL TUTORIAL CAN BE FOUND HERE

TUTORIAL - GENESIS HEAT SET PAINT -COLOR #2 - BABY SKIN

Genesis Instructions
Color #2: Baby Skin


 Color #2 (Baby Skin). This color is an all over color that brings depth to the skin tone. Thin this color to the consistency of watercolor. Use a mop brush to dab this color onto a cosmetic wedge lightly. Now take the wedge and lightly pounce the color all over the doll. Keep pouncing the paint until you achieve an even tiny pin-dot look to the skin. If your baby looks chalky you have added to much paint and will want to dab a cosmetic wedge into straight Mineral Spirits and pounce over the paint to remove the excess. You can also use Mineral Spirits to remove any areas of paint that you are not happy with to redo them.


Bake: At this point, we recommend baking so that you do not ruin the tiny pin dot skin tone you have created. Bake at 260 - 265 F for 8-10 minutes. Use an oven thermometer to make sure it does not get too hot. Place the vinyl parts on a baking dish in a bed of poly-fil. I would have a couple inches of thickness between the parts and the bottom or sides of the pan to prevent melting. Never leave your doll unattended while baking.
Important!
  • Use an accurate oven thermomoter and a timer when baking the doll. Do not trust your regular oven thermometer, as they are often very inaccurate! Bountiful Baby sells oven thermometers, if you need one.
  • Have your oven be exclusively for the use of Genesis paints. Do not also bake food in the oven, or otherwise use it for any other purposes.
  • We recommend that you use a special type of oven called a "convection oven" for heat setting Genesis paints, because it heats more uniformly and without "hot spots". At Bountiful Baby, we use a convection oven that we bought at WalMart for $200. If you use some other type of oven, it could result in overheated "hot spots" in/on your vinyl parts, with the associated fuming risks of overheated vinyl. This applies to toaster ovens, roaster ovens, or any other electric or gas oven. We recommend that you do not use them-- that you use a dedicated convection oven instead.
  • Put your convection oven in a well-ventilated place. If you "overbake" vinyl, it will emit fumes, as any overheated vinyl will do. So be careful not to set the temperature too high, or to let it bake too long. And take suitable ventilation precautions. Even if it doesn’t burn, hot vinyl fumes have the potential to be toxic.
  • We recommend that you use "test parts" to initially set your oven temperature and baking time. Test parts are available from Bountiful Baby at a very nominal cost.
  • Remember, you only want to heat the vinyl sufficiently to cure the Genesis paint, and nothing more! It is your responsibility to reach that point, and not exceed it.

Sunday, January 29, 2012

TUTORIAL- GENESIS HEAT SET PAINT-COLOR #1: VEIN BLUE

Genesis Instructions
Color #1: Vein Blue 


 Using your mop brush put a small amount of paint on the brush.Lightly paint the inside of the head around the eye and nose area only (to add a little depth).
  

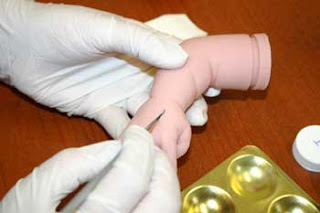
Next using your #1 liner brush paint veins on the outside of the head, wrists and ankles, by lightly loading the brush with paint and then painting onto a cosmetic round to remove a little of the excess paint. This color has a tendency to stain the vinyl, so be careful not to overload your brush.

 With a loose and free hand paint veins one at a time as illustrated below, or a similar pattern of your own design. 

 These above pictures show the veining painted more heavily than recommended.  It is for illustration purposes only, so that you can see the veining (otherwise the photography wasn't showing the veining as well).

 Use a cosmetic wedge, as needed, to lightly pounce on the veins to soften the look. You can see subtle veining in this picture around the temple area.


ORIGINAL TUTORIAL CAN BE FOUND HERE

Friday, January 27, 2012

TORY GETS SOME VEINS

so, the next step for allot of reborn artist after they have washed and dried their kit of choice is to paint some veins on the kit.

this was a new venture i was undertaking. and really...thought it was really simple (in theory) until i did it.

it wasnt so much the veining that got to me, as much as figuring out the  quotient of  GENESIS HEAT SET PAINT to THINNER...it was a hit or miss.

this is what i accomplished.


pictures look better than it did in person, but then im faily critical of my won work...i thought it was way too dark. but on here, it looks fine.

MICHELLE